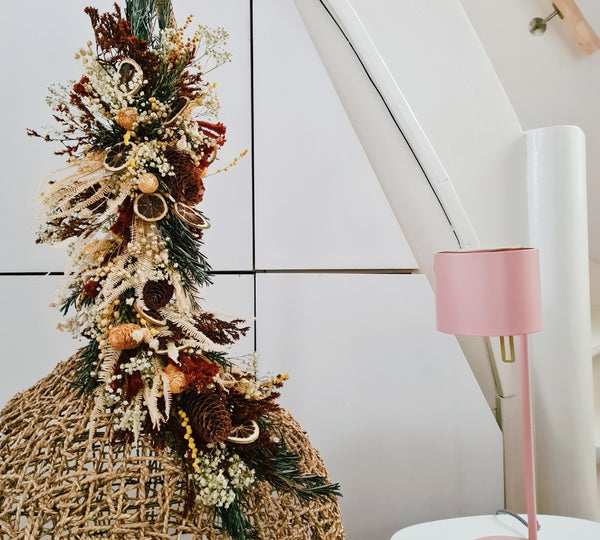
Make your own garland for the Christmas table in 11 easy steps with dried flowers
Do you want to make it cozy during the holidays and do you want flowers on the table? And do you also like to get started with a DIY project yourself? Then this garland is the perfect decoration for the table and because it consists entirely of dried flowers and preserved flowers, you can keep it safe until next Christmas!
Get started and create a festive garland for Christmas with the following 11 steps. Place them in the middle of the table for a dressed up effect or go for a cozy decoration of the living room by placing them on the fireplace, for example. This DIY garland can be made by anyone who likes to work with their hands and be creative, good luck!

1.Preparations
Collect a dozen types of dried flowers. For this Christmas garland we used preserved rosemary, dried pine cones, dried lime, bleached ferns, brown tatarica , gypsophila , linum gold and mimosa. Provide a large roll (small to medium thick) of wire, a sturdy rope of about 60 centimeters and a pair of scissors. Ready to start?

2. Put dried flowers on wire:
To use dried items like lime or pine cones they need a stem that you make with a piece of wire. Wrap the wire around the pine cone or insert it through the lime and tighten the wire. Then make a stem of at least 10 cm.

3. And then really start now?
To build the DIY garland we start at one side of the rope. Preferably use preserved greenery such as rosemary to start and place a few stems at the starting point of the rope. Tie the stems tightly with a longer piece of wire around the string.

4. Add other types of dried flowers
Now place a new variety of dried flowers such as brown tatarica slightly below the green branches and tie it firmly to the rope with the long iron wire. Build your garland piece by piece by adding a different type of dried flowers each time.

5. Cut your stems short
When adding any type of greenery or dried flowers, you will then cut the stems short, which is best done just below the wire. Has your long iron deed run out? Then just use another piece of wire and keep building your garland.

6. Provide volume, left, right and top
Keep adding the greenery and dried flowers one by one. Make sure you systematically add volume on the left, right and top so that you get a nicely filled garland that can be admired on all sides. Do you have a larger branch? Then you can safely split it on both sides like this branch of bleached fern.

7. Are we done?
Keep adding to your garland until you reach the last four inches of string. Now comes the slightly more difficult part, but we are sure you will make it through!

8. Do the same in reverse
To ensure a balanced garland that looks the same on both sides, we'll start again with a few sprigs of rosemary, but this time we'll start at the other end of the rope. Build up the garland in the same way with the same volume until you reach the point where the two sides meet. Don't forget to cut your stems short again. Attention: because you have to tie a lot in the same place you will create a thick pack of branches and wire, this is normal.

9. A large bundle of branches and wire?
Have you reached a big bundle like the pictures below? Perfect! Then our Christmas garland is almost ready!

10. Use the bundle as a pincushion.
As the final piece, we need to fill in the empty holes in our beautiful Christmas garland. Both on the left, right and on top, you are supposed to keep adding dried flowers until there are no more holes or wire to be seen, but without using the wire. How? Very simple, use the thick bundle of twigs and wire as a pin prick cushion and insert smaller twigs that will stick by themselves!

11. Finish
Completely filled? Well done! As icing on the cake, you can arrange the pine cones and branches so that they all point neatly to the outside for a radiant effect. And now enjoy a beautifully decorated festive table!